
Pink Vision Boards for Your Dream Room Makeover: A Creative Guide to Manifesting Your Perfect Space
Essential Information
Prep Time: 1-3 hours
Total Time: 1-3 hours
Project Scale: Individual/Group
Difficulty: Easy to Moderate
Cost: $20-$100
Equipment Needed
Essential Tools:
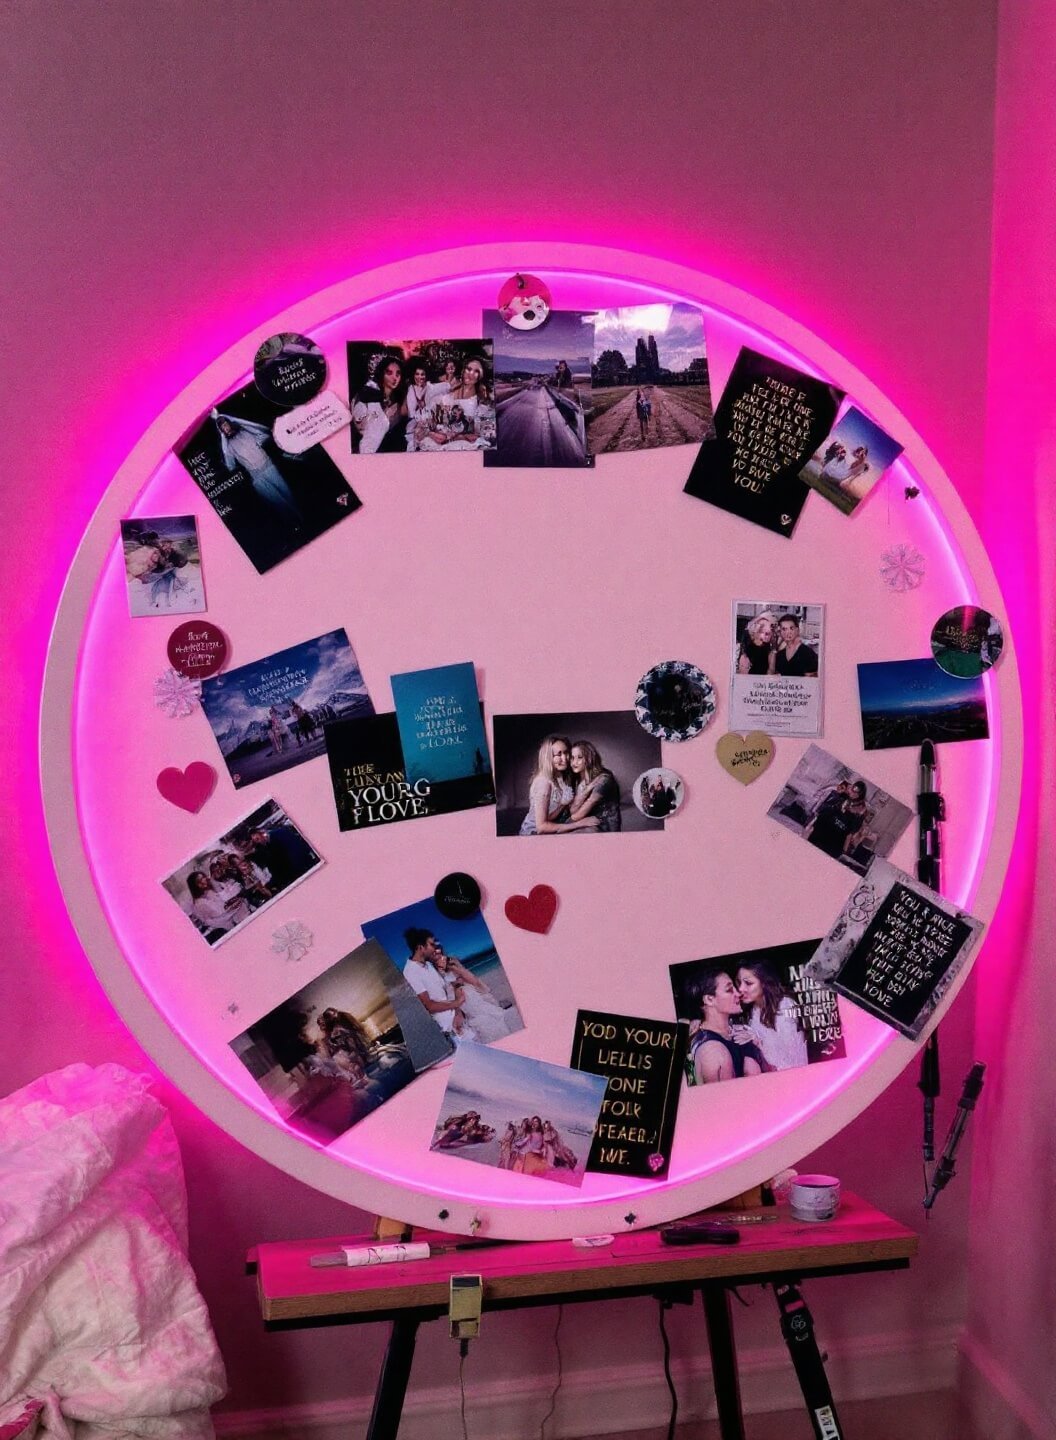
- Large foam board or sturdy cardboard (21″ circle recommended)
- Sharp scissors
- Strong glue stick
- Gel pens/markers
- Photo mounting squares
- Hanging hardware
Optional Tools:
- Washi tape
- Craft knife
- Ruler
- Digital printer
- Clear protective sleeve
Materials Required
Base Components:
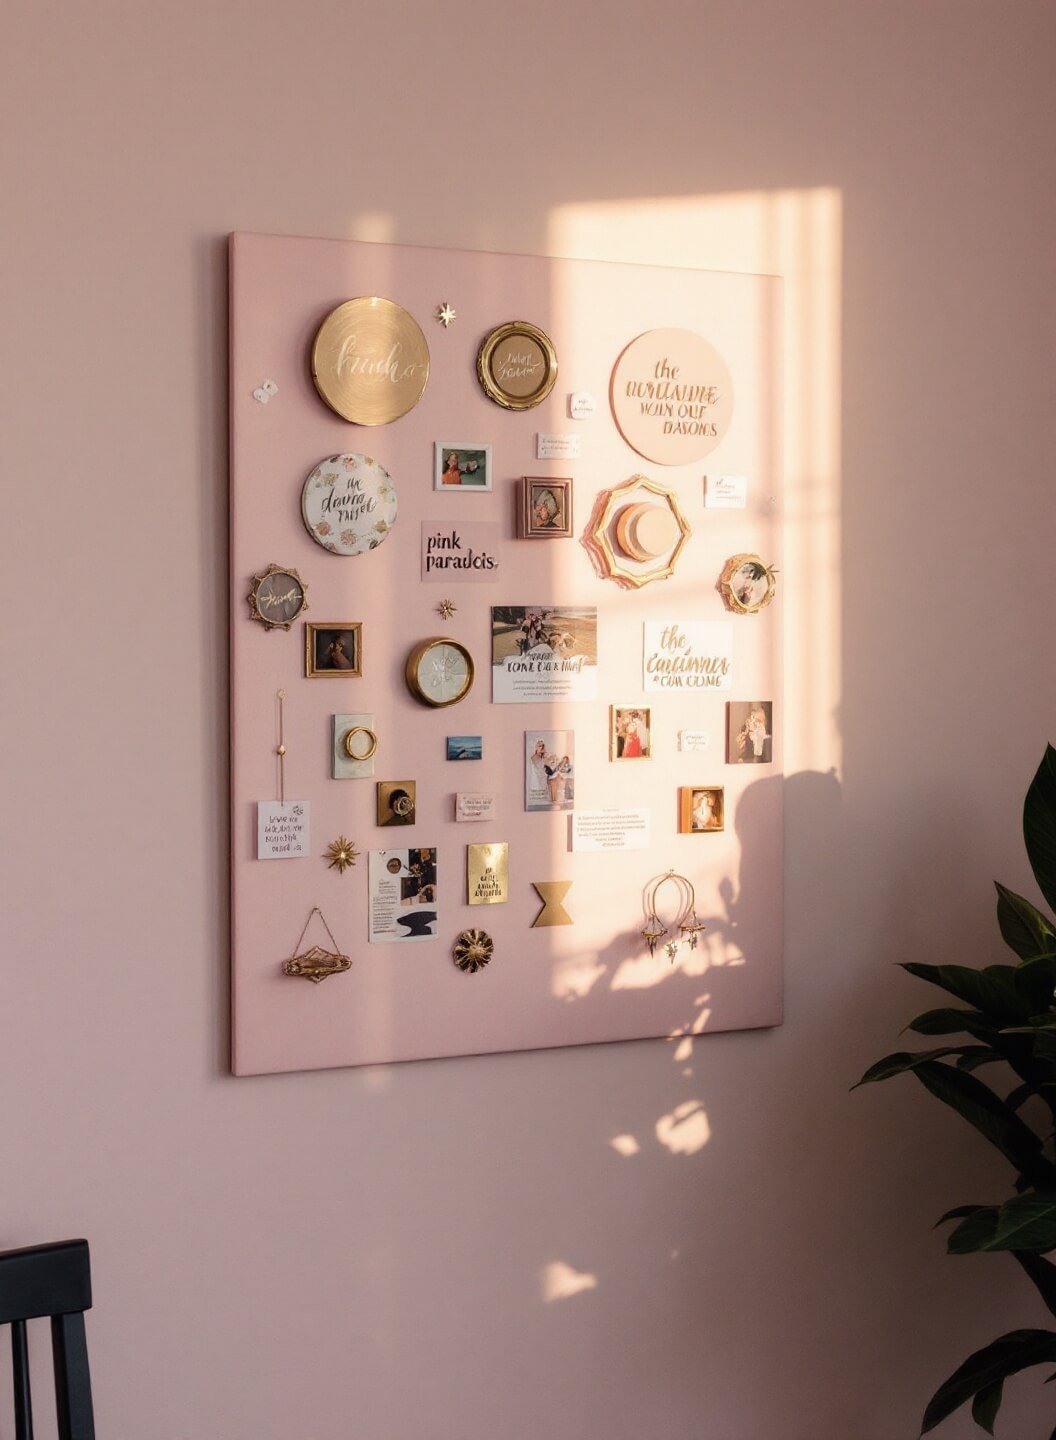
- 1 foam board (21″ circle) – white or custom color
- 1 goal-setting workbook or planner
- Collection of inspiring images (digital prints or magazine cutouts)
- Decorative elements (stickers, ribbons, glitter)
- Personal photos and meaningful quotes

Method
1. Preparation
Set up your workspace with all materials within reach.
Clear a large, flat surface.
Ensure good lighting for detailed work.
2. Planning
Map out your room goals in the workbook. Break down your vision into specific areas:
- Color scheme
- Furniture layout
- Storage solutions
- Lighting ideas
- Decorative elements
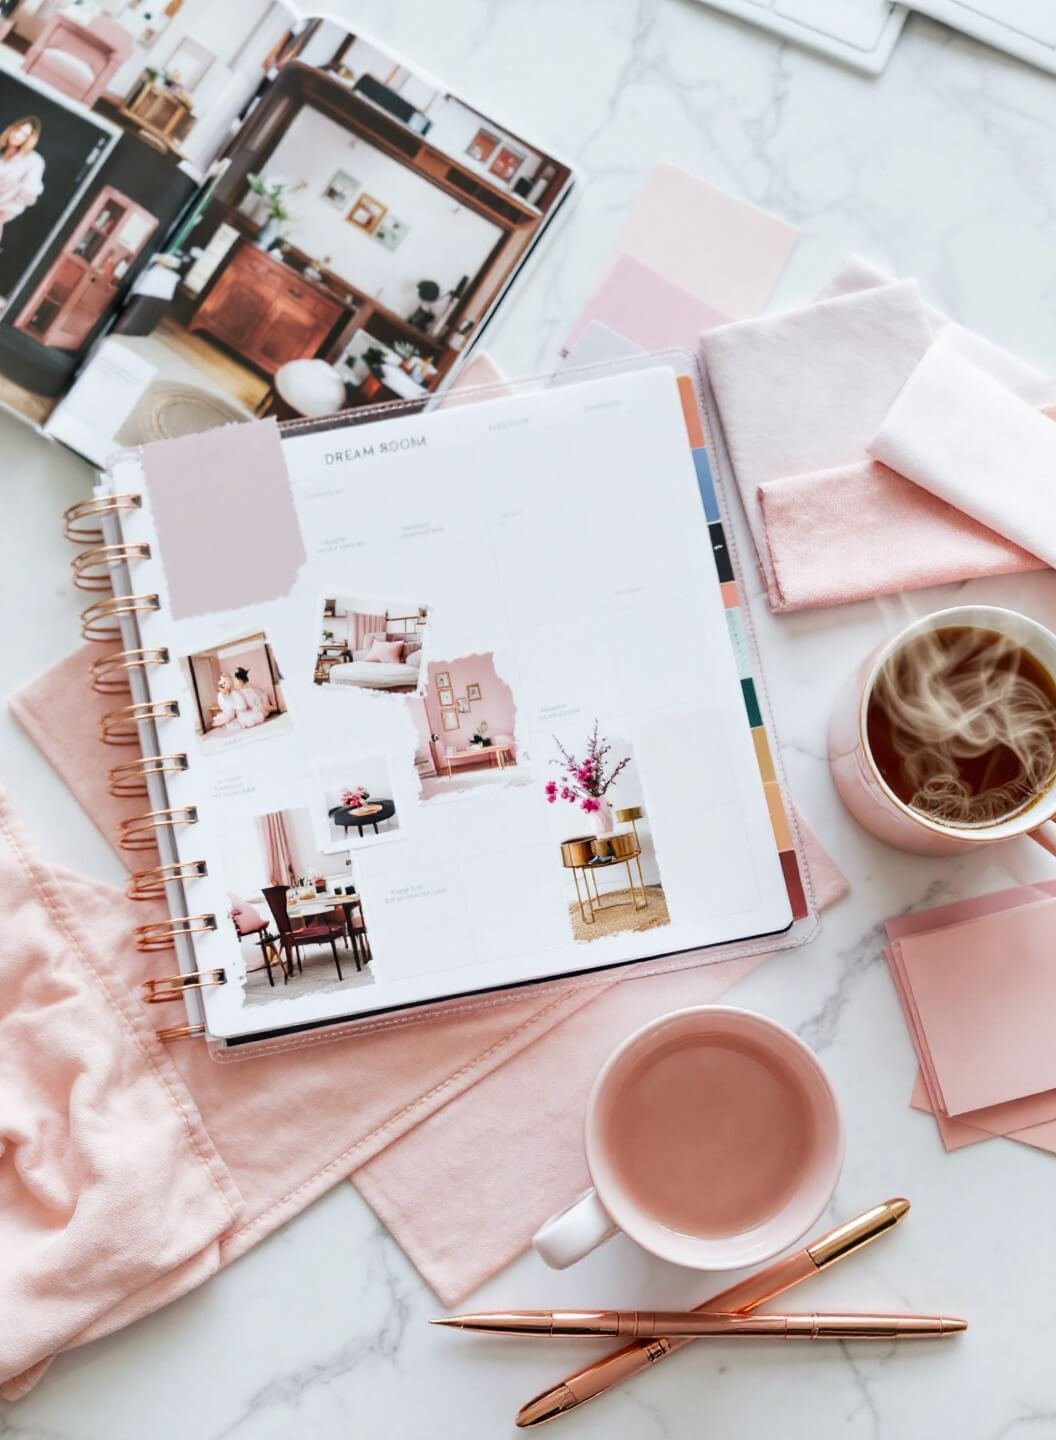
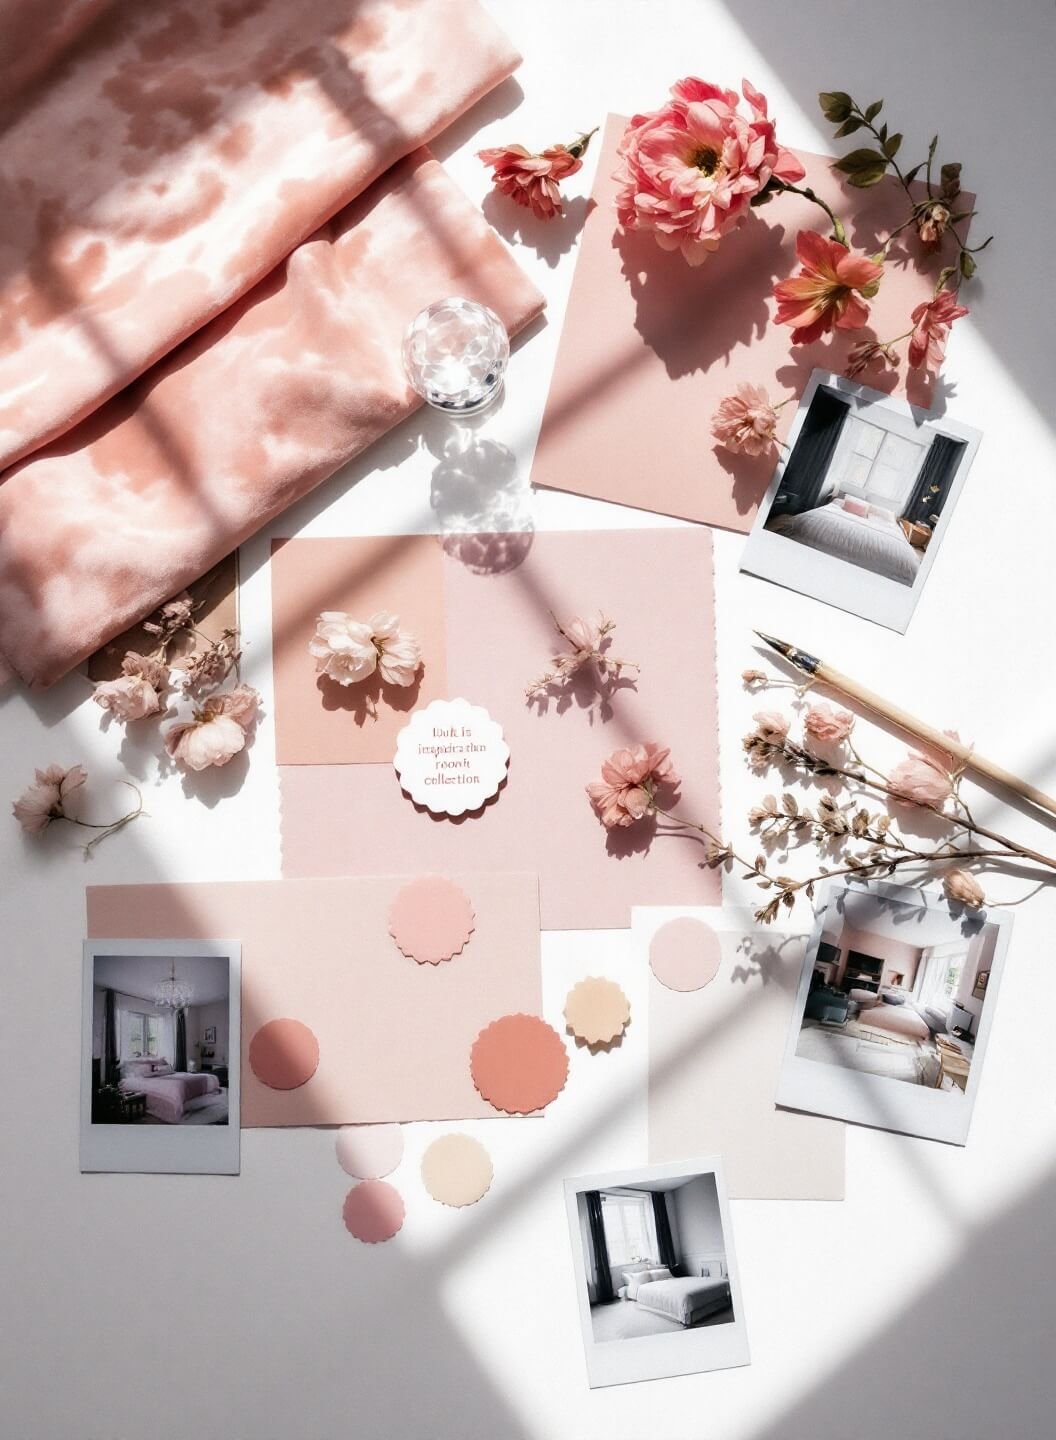
3. Content Gathering
Collect images that represent your dream room:
- Pinterest inspiration
- Magazine cutouts
- Personal photos
- Color swatches
- Fabric samples
4. Arrangement
Position elements before gluing:
- Larger images as focal points
- Create visual flow
- Leave breathing space
- Layer elements thoughtfully
5. Assembly
Work from center outward. Secure each piece with appropriate adhesive. Add dimensional elements last.
Crucial Tips
- Don’t overcrowd – white space is important
- Use high-quality images for better visualization
- Secure edges thoroughly to prevent lifting
- Position board where you’ll see it daily
Storage & Maintenance
- Keep away from direct sunlight
- Store flat when not displayed
- Clean with gentle dusting
- Consider lamination for longevity
Variations
Modern Minimal:
- Monochromatic pink scheme
- Clean lines
- Limited elements
Boho Pink Paradise:
- Mixed patterns
- Textural elements
- Natural materials
Digital Alternative:
- Use Canva or Pinterest
- Create mobile-friendly versions
- Easy to update and share
Common Mistakes to Avoid
- Rushing the planning phase
- Using weak adhesives
- Making it too cluttered
- Choosing unrealistic inspiration
Remember: Your vision board should spark joy every time you look at it. Keep it authentic to your style while maintaining a cohesive pink theme that inspires your dream room transformation.

